
Table of Contents
- Introduction
- Understanding the Needs of Dry Skin
- The Essential Ingredients for a Botanical Lotion
- How to Make Homemade Lotion for Dry Skin: A Step-by-Step Guide
- Customizing with Phyto-Aromatic Benefits
- Elevating the DIY Experience with a Professional Ritual
- When to Choose Professional Formulations
- Tips for a Non-Greasy Finish
- Safety and Storage Considerations
- The Longevity of Botanical Skincare
- Conclusion
- FAQ
Introduction
The feeling of dry, tight skin can be more than just a seasonal inconvenience; it often signals a need for a deeper, more intentional connection to your skincare ritual. Whether you are navigating the harsh winds of winter or simply seeking a more natural way to nourish your body, crafting your own moisturizer offers a tactile, rewarding experience. In this guide, we will explore the foundational steps of creating a botanical-rich cream that comforts the skin and restores its radiant appearance. At Yon-Ka Paris, we have spent over 70 years perfecting the art of phyto-aromatic formulation, and we believe that understanding the ingredients you apply to your skin is the first step toward a healthier glow. Learn more about our ingredients and the plant-based philosophy behind our formulas. This article provides a sophisticated approach to DIY skincare, blending traditional methods with professional insights into plant-based wellness.
Understanding the Needs of Dry Skin
Before reaching for the mixing bowl, it is essential to understand what dry skin truly requires. In the world of professional skincare, we distinguish between "dry" skin, which lacks oil (lipids), and "dehydrated" skin, which lacks water. True dry skin often has a compromised moisture barrier, meaning it cannot effectively retain the hydration it receives.
To address this, a high-quality lotion must act as both an emollient and an occlusive. Emollients, such as shea butter and jojoba oil, fill in the microscopic gaps between skin cells to create a smooth surface. Occlusives, like beeswax, create a breathable protective layer that prevents transepidermal water loss (TEWL), the process where moisture evaporates from the skin into the air.
For a more targeted starting point, explore our Dry & Dehydrated Skin collection, which focuses on comfort, barrier support, and lasting hydration. By crafting a homemade lotion, you have the power to select specific botanical lipids that mimic the skin’s natural sebum. This personalized approach allows you to avoid common irritants and focus entirely on the regenerative power of plants.
The Essential Ingredients for a Botanical Lotion
A successful homemade lotion relies on a balanced ratio of hard butters, liquid carrier oils, and a stabilizing agent. Because we are focusing on a formula that is shelf-stable without synthetic preservatives, this recipe is technically a "body butter" or an "anhydrous balm," meaning it contains no water.
Nourishing Plant Butters
Shea butter is perhaps the most celebrated botanical fat for dry skin. Derived from the African karite tree, it is exceptionally rich in vitamins A and E. Its high concentration of fatty acids makes it a superb emollient that melts at body temperature. If you find the scent of unrefined shea butter too nutty, you may opt for refined shea or substitute it with cocoa butter, which offers a firm consistency and a delightful chocolate-like aroma.
Selecting the Right Carrier Oils
The carrier oil determines how quickly the lotion absorbs and how "heavy" it feels on the skin.
- Jojoba Oil: This is technically a liquid wax that closely resembles human sebum. It is an excellent choice for those who want deep nourishment without a greasy residue.
- Sweet Almond Oil: Rich in proteins and vitamin D, this oil is legendary for its ability to soften the skin's appearance and soothe dry patches.
- Grapeseed Oil: If you prefer a lighter finish, grapeseed oil is high in linoleic acid and absorbs rapidly, making it ideal for daytime use.
The Role of Beeswax
Beeswax acts as a natural emulsifier and thickener. More importantly, it provides a protective barrier against environmental aggressors like wind and cold. For those following a vegan lifestyle, candelilla wax or carnauba wax can be used as alternatives, though you may need to adjust the quantities as these waxes are often firmer than beeswax.
How to Make Homemade Lotion for Dry Skin: A Step-by-Step Guide
This recipe creates a luxurious, whipped texture that feels like a professional spa treatment in the comfort of your home.
Equipment Needed
- A heat-safe glass bowl
- A medium saucepan (to create a double boiler)
- An electric hand mixer or stand mixer
- Sterilized glass jars for storage
Ingredients
- 1/2 cup raw shea butter
- 1/4 cup jojoba oil or sweet almond oil
- 1 tablespoon beeswax pellets
- 1/4 teaspoon Vitamin E oil (acts as an antioxidant to protect the oils)
- 15–20 drops of high-quality essential oils (optional)
Step 1: Gentle Melting
Place the shea butter, carrier oil, and beeswax into your glass bowl. Set the bowl over a saucepan filled with two inches of simmering water. It is vital to use low heat to preserve the integrity of the botanical nutrients. Stir occasionally until the mixture is completely liquid and transparent.
Step 2: The Initial Cooling
Remove the bowl from the heat and let it sit at room temperature for about ten minutes. At this stage, stir in the Vitamin E oil. This is also the time to add any specialized botanical boosters. If you find your skin is exceptionally depleted, adding a few drops of a professional concentrate like Serum Omega can infuse the blend with extra nourishment and comfort.
Step 3: Achieving the Perfect Consistency
Place the bowl in the refrigerator for 30 to 45 minutes. You are looking for the mixture to become opaque and semi-solid, but not hard. If you can leave a fingerprint in the surface easily, it is ready for the next step.
Step 4: The Whipping Process
Using your electric mixer, whip the mixture on a medium-to-high setting. Within a few minutes, the yellow liquid will transform into a white, airy, cloud-like cream. This process incorporates air, making the lotion easier to spread and more pleasant to apply.
Step 5: Scenting and Storage
Once the lotion is fluffy, add your essential oils and whip for another 30 seconds to distribute them evenly. Spoon the finished product into your sterilized glass jars. Because this formula contains no water, it can last for up to six months if stored in a cool, dark place.
Quick Answer: To make a homemade lotion for dry skin, melt 1/2 cup shea butter, 1/4 cup carrier oil (like jojoba), and 1 tablespoon beeswax in a double boiler. Once cooled to a semi-solid state, whip the mixture with an electric mixer until fluffy and store in a glass jar.
Customizing with Phyto-Aromatic Benefits
At the heart of our philosophy is the use of essential oils not just for fragrance, but for their ability to support the skin's natural functions. When customizing your homemade lotion, consider the "aromachology" behind the scents.
- Lavender: Renowned for its calming properties, it is ideal for a nighttime body ritual.
- Geranium: Helps to balance the appearance of the skin and offers a sophisticated floral note.
- Rosemary: Can help revitalize the look of tired, dull skin.
These ingredients are part of our signature Quintessence, a proprietary blend of five essential oils that forms the foundation of nearly every Yon-Ka formula. For a deeper look at the role of plant extracts and essential oils in our skincare, visit our ingredients page. While creating your own blend, remember that essential oils are highly concentrated. Always perform a patch test on your inner forearm for 24 hours when introducing a new essential oil to your routine. If you experience persistent redness or irritation, reduce the concentration or discontinue use.
Elevating the DIY Experience with a Professional Ritual
While a homemade body butter provides excellent occlusive protection, dry skin often benefits from a layered approach. In our professional treatments, we never apply a moisturizer to "dry" skin. Instead, we prepare the skin to receive the product.
Step 1: Proper Cleansing. Use a gentle, milk-based cleanser like Lait Nettoyant. This ensures the skin is clean without stripping away the vital lipids your homemade lotion is trying to replace.
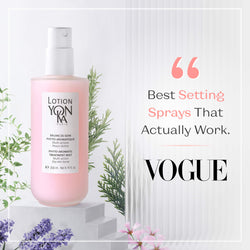
Step 2: Hydrating Mist. Before applying your whipped lotion, mist the skin with Lotion Yon-Ka PS. This phyto-aromatic toner hydrates the upper layers of the epidermis, allowing the oils in your lotion to "lock in" that moisture more effectively.
Step 3: Application. Apply your homemade lotion while the skin is still slightly damp from the mist. This creates a makeshift emulsion on the skin's surface, improving absorption and leaving the skin feeling supple rather than greasy.
Key Takeaway: The most effective way to treat dry skin is through layering. Use a hydrating mist before your oil-based lotion to ensure you are providing both the water the skin craves and the lipids it needs to stay protected.
When to Choose Professional Formulations
There is a profound joy in DIY skincare, but there are instances where lab-stabilized, professional products are necessary for specific concerns. Homemade lotions are excellent for general body care, but the face often requires a more sophisticated molecular structure.
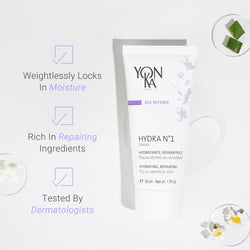
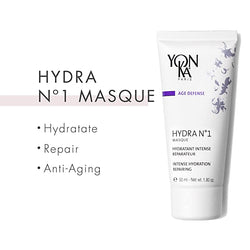
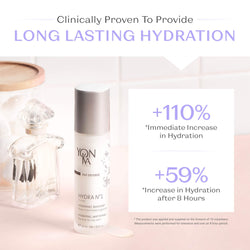
Our Hydra n°1 approach, for instance, utilizes multiple weights of hyaluronic acid. Hyaluronic acid is a humectant that can hold up to 1,000 times its weight in water. While oils and butters provide the barrier, humectants provide the deep-down "plumpness" that DIY oil-based recipes cannot achieve on their own.
Furthermore, professional formulations undergo rigorous stability testing. Homemade products are sensitive to temperature changes and can separate or oxidize if not handled carefully. If you are dealing with significant signs of aging or intense sensitivity, a product like Excellence Code Crème offers targeted support and standardized botanical extracts that deliver consistent, measurable results for the skin's appearance. You can also browse our anti-aging collection for more advanced options.
Tips for a Non-Greasy Finish
One common complaint with homemade lotions is that they can feel overly oily. To mitigate this, consider adding a small amount of arrowroot powder (about one teaspoon per batch) during the whipping stage. Arrowroot helps to cut the greasiness of the butters, leaving a "silky" rather than "shiny" finish on the skin.
Another tip is to pay attention to the quantity used. Because homemade lotions are concentrated and contain no water or fillers, a "pea-sized" amount is often enough for an entire arm. Warm the product between your palms first to melt the waxes and butters, then press it into the skin.
Safety and Storage Considerations
Since this recipe is free of water, it is naturally resistant to mold and bacteria. However, safety is paramount.
- Avoid Water Contamination: Always use dry hands or a clean spoon to scoop the product out of the jar. Introducing water into the jar can lead to spoilage.
- Store Correctly: Keep your lotion away from direct sunlight and heat, which can cause the oils to go rancid or the whipped texture to collapse.
- Patch Test: As mentioned, always test new essential oils. If you have a known allergy to nuts, avoid sweet almond oil and opt for jojoba or apricot kernel oil instead.
The Longevity of Botanical Skincare
Choosing to make your own lotion is a beautiful way to honor the power of nature. This practice aligns with the values we hold dear: a commitment to gluten-free, vegan-friendly ingredients and a rejection of harsh chemicals like parabens, phthalates, and SLS.
Whether you are whipping up a batch of shea butter lotion for yourself or as a thoughtful gift, you are participating in a tradition of botanical wellness that spans decades. For those who want to dive deeper into their skin’s specific needs before starting a DIY project, we recommend using our Dry & Dehydrated Skin collection or exploring what face products work best for dry skin. These tools can help you identify whether your skin is truly dry or simply dehydrated, ensuring your homemade creations are as effective as possible.
Conclusion
Creating a homemade lotion for dry skin is an empowering ritual that connects you to the raw materials of the earth. By selecting high-quality butters, oils, and waxes, you can craft a moisturizer that provides comfort and a healthy-looking glow. While these DIY recipes are a wonderful addition to a holistic lifestyle, they are most effective when integrated into a consistent, layered skincare routine that respects the skin’s delicate barrier.
At Yon-Ka Paris, our mission remains rooted in the belief that skincare is a moment of wellbeing, a daily pause to nourish both the body and the spirit. We invite you to explore our full range of professional collections, from the hydrating Hydra n°1 line to our revitalizing Age Defense range, to find the perfect companions for your botanical journey.
"Skincare is more than a routine; it is a ritual of self-care that celebrates the harmony between pharmaceutical rigor and the soul of plants."
If you are curious about a more hands-on professional experience, explore our treatments to see how Yon-Ka rituals can complement your at-home care.
FAQ
Can I use homemade lotion on my face?
While you can use homemade shea butter lotion on your face, those with oily or acne-prone skin should be cautious as heavy butters can be comedogenic for some. For facial care, it is often better to use a lighter, professionally formulated cream like Excellence Code Crème, which is designed to support the skin without feeling overly heavy.
Why did my homemade lotion turn grainy?
Graininess usually occurs when shea butter is cooled too slowly, causing the fatty acids to crystallize at different rates. To prevent this, ensure you melt the butter completely and consider cooling the mixture quickly in the refrigerator or an ice bath before whipping. If you want a gentler exfoliating step before moisturizing, a product like Gommage Yon-Ka can help smooth the look of skin without harsh abrasion.
How long does DIY lotion stay fresh?
Since this recipe contains no water, it has a shelf life of approximately six months. To maximize freshness, add a few drops of Vitamin E oil, which acts as a natural antioxidant to prevent the carrier oils from going rancid over time.
What is the best oil for extremely dry skin?
For intense dryness, jojoba oil and avocado oil are excellent choices because they are rich in fatty acids and vitamins. If you want to boost the efficacy of your lotion, you can also mix in a few drops of Serum Omega, which is specifically designed to restore lipids and provide comfort to depleted skin.
How do I know if I need more than DIY care?
If your skin stays tight, flaky, or uncomfortable even after consistent moisturizing, it may be time to move beyond a homemade blend. In that case, consider a visit to a Yon-Ka professional and use our spa and beauty salon locator to find expert guidance near you.